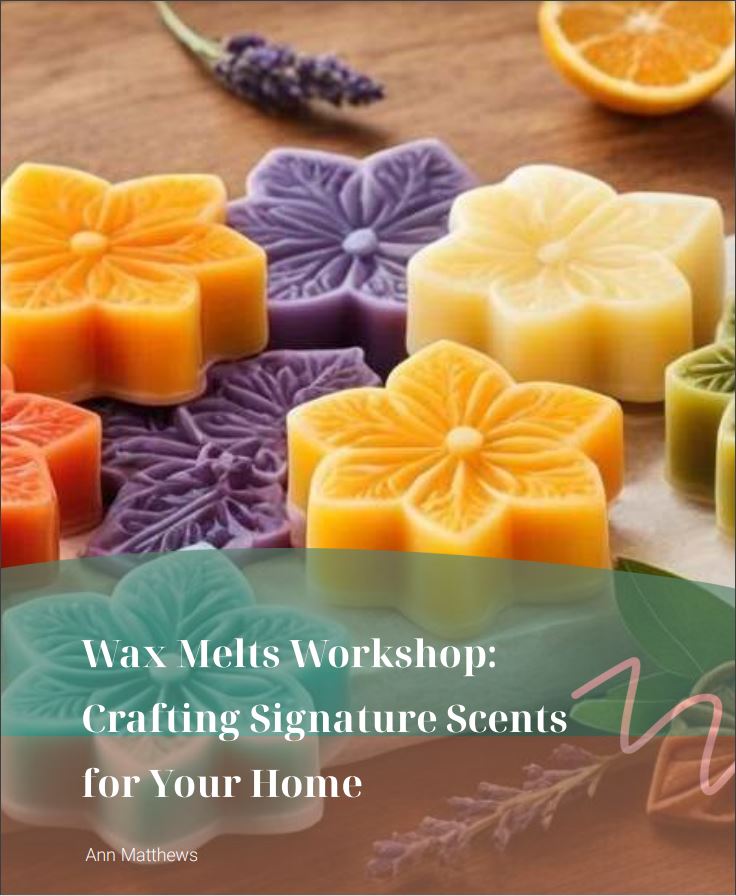
DIY Guide: How to Make Your Own Wax Melts
waxmelts.info and its partners may earn a commission if you purchase a product through one of our links
Making your own wax melts is a fun and easy project that allows you to create customized fragrances for your home or to give as gifts. In this DIY guide, we will walk you through the steps and provide helpful tips on how to make your own wax melts using paraffin or soy wax. Whether you are a beginner or an experienced crafter, these instructions will help you create beautiful and fragrant wax melts that will fill your home with delightful scents.
Key Takeaways:
- Learn how to make your own wax melts at home
- Customize fragrances and colors to suit your preferences
- Choose between paraffin wax, soy wax, or beeswax for your melts
- Use silicone molds or clamshell molds for shaping your melts
- Package and store your homemade wax melts properly for long-lasting fragrance
What Are Wax Melts and How Are They Different From Candles?
Wax melts are small pieces of scented wax that are heated in an electric wax warmer – a safer alternative to candles – to release their fragrance. Unlike traditional candles, wax melts can be left unattended, making them a convenient and worry-free option for creating a pleasant ambiance in your home. While wax melts and scented candles share common ingredients such as paraffin or soy wax and fragrance oils, they differ in size and shape.
Unlike candles that have a wick and come in larger sizes, wax melts are poured into molds resulting in smaller pieces. This allows for precise portioning and allows you to experiment with different scents and combinations. When placed in a wax warmer, the heat gently melts the wax, releasing the fragrance into the air, without an open flame or burning wick.
Wax melts offer an alternative and versatile way to enjoy scented wax, providing a range of benefits such as convenience, safety, and the ability to easily switch between different fragrances.
The Benefits of Wax Melts:
- Safer than burning candles and can be left unattended.
- Wide range of scents and combinations to suit your preferences.
- Easier portion control and customization with smaller wax melts.
- No soot or residue, keeping your wax warmer clean.
- Ability to quickly switch between different fragrances.
With their increasing popularity, wax melts have become a go-to choice for creating a cozy atmosphere without the worry of open flames. Now that you know the basics of wax melts, let’s explore how to choose the best wax for your DIY wax melt creations in the next section.
Choosing the Best Wax for DIY Wax Melts
When it comes to making your own wax melts, there are several options for the type of wax you can use. Whether you prefer a common and readily available option like paraffin wax, or you want to explore alternatives like soy wax or beeswax, your choice will impact the final result of your homemade wax melts.
Paraffin wax is a popular choice for DIY wax melts. It is affordable and widely accessible, making it a convenient option for beginners. Paraffin wax has a high melting point, which ensures that your wax melts will retain their shape and consistency in various room temperatures.
If you’re looking for a more natural alternative, soy wax is a great option. It is derived from soybean oil and is known for its clean-burning properties. Soy wax has a lower melting point compared to paraffin wax, which allows for a longer working time when pouring the wax into molds. This flexibility makes soy wax an excellent choice for intricate or detailed designs.
For those who prefer a unique touch to their wax melts, beeswax is an intriguing option. Beeswax has a natural and pleasant honey-like scent that can enhance the fragrance of your wax melts. It is also known for its longer burn time and ability to hold onto essential oils, resulting in a stronger and longer-lasting scent.
When deciding which wax to use for your DIY wax melts, consider your preferences and the desired properties of your final product. Whether it’s the affordability and convenience of paraffin wax, the natural and clean-burning qualities of soy wax, or the unique fragrance and longer burn time of beeswax, the choice is yours to make.
Take a look at the following table for a quick comparison of the different wax options:
| Wax Type | Properties |
|---|---|
| Paraffin Wax | Common, affordable, high melting point |
| Soy Wax | Natural, clean-burning, lower melting point |
| Beeswax | Natural, honey-like scent, longer burn time |
Now that you have a better understanding of the different wax options available, you can choose the best wax for your DIY wax melt project. Whether you prioritize affordability, natural ingredients, or unique scents, selecting the right wax will help you create beautiful and fragrant wax melts that will bring joy to your home.
Getting the Right Supplies and Equipment
To make your own wax melts, you will need a few supplies and equipment. Gathering the right tools will ensure a successful wax melt making process.
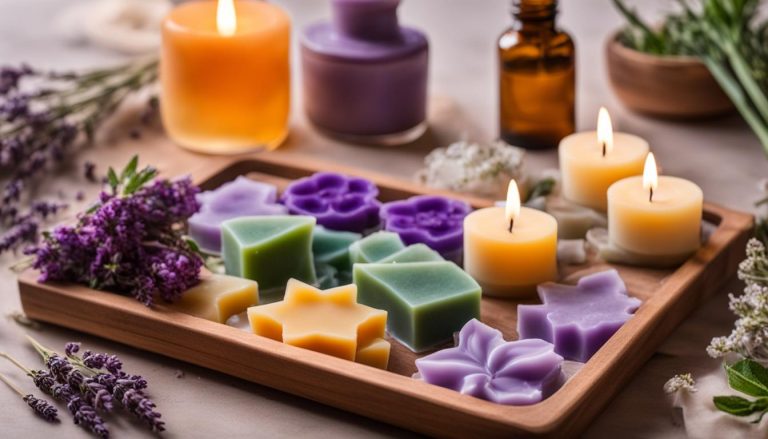
Wax Molds
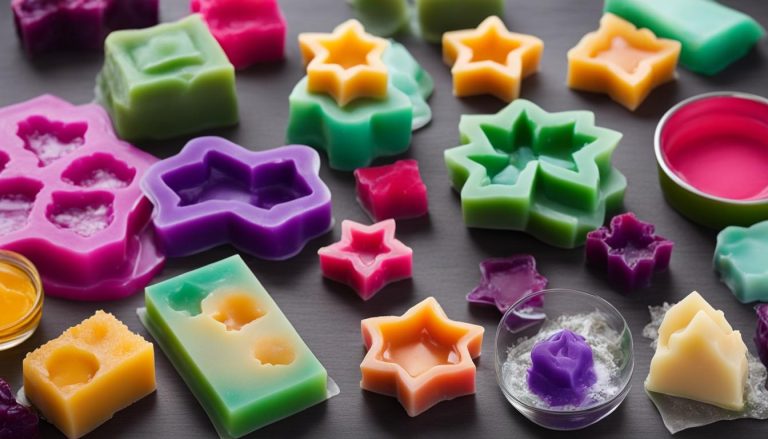
Choose the right molds to create beautiful and unique wax melt shapes. Silicone candy molds and clamshell molds are popular options that offer a wide variety of designs. These molds make it easy to create professional-looking wax melts.
| Mold Type | Example |
|---|---|
| Silicone Molds |  |
| Clamshell Molds | |
Fragrant Oils
Add delightful scents to your wax melts with a wide range of fragrance oils. From floral to fruity to exotic, there are endless options to choose from. These oils will fill your home with inviting aromas.
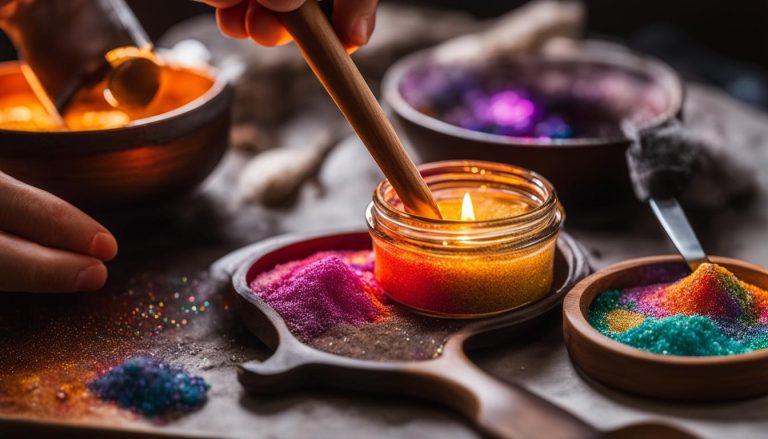
Wax Dye
If you want to add a pop of color to your wax melts, consider using wax dye. While optional, wax dye can enhance the visual appeal of your homemade melts. Just a few drops can create vibrant and eye-catching hues.
Other Supplies and Equipment
In addition to mold, fragrance oils, and wax dye, here are some other essential supplies and equipment you’ll need:
- A metal pitcher for melting the wax
- A plastic eye dropper for precise fragrance oil measurement
- A digital meat thermometer to monitor the wax temperature
- A wax warmer for melting the wax (make sure it’s specifically designed for wax melts)
Having these supplies and equipment ready will make the wax melt making process smooth and enjoyable.
The Step-by-Step Process of Making Wax Melts
Making wax melts is a creative and rewarding DIY project that allows you to customize your scents for a delightful aroma in your home. Follow these step-by-step instructions to create your own wax melts from scratch.
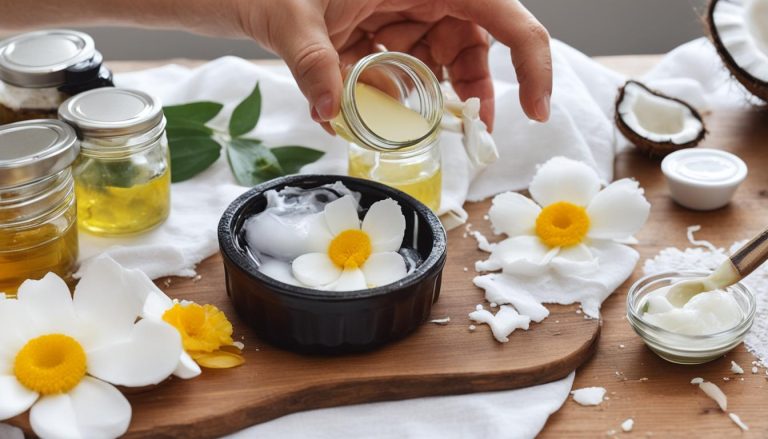
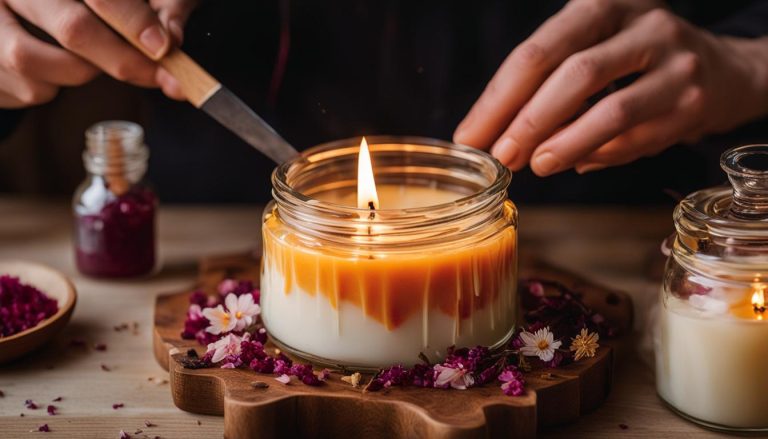
- Measure and melt the wax: Begin by measuring the desired amount of wax. Use a double boiler or microwave to melt the wax to the recommended temperature. Ensure that the wax is completely melted and smooth.
- Add wax dye and fragrance oil: If desired, add wax dye to the melted wax to give your melts a pop of color. Then, carefully add your chosen fragrance oil. The amount of fragrance oil will depend on the recipe you are using. Refer to the recommended guidelines for the correct ratio.
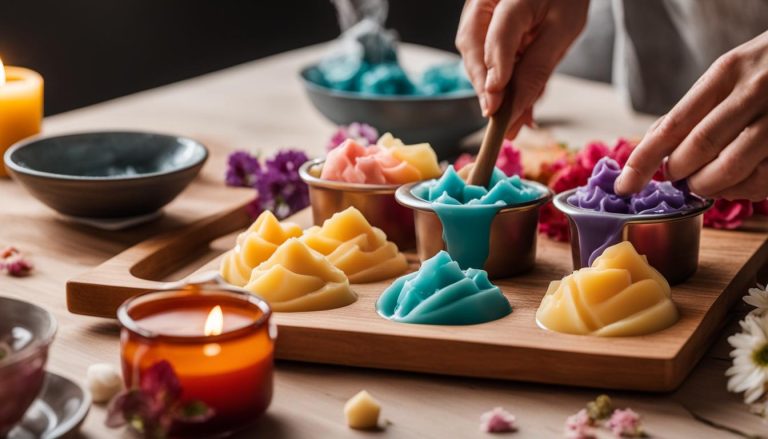
- Fill the molds: Once the wax is fully melted and scented, it’s time to fill the molds. You can either use an eye dropper for precision or pour directly from the pitcher. Fill each mold to the desired level, leaving a small space at the top.
- Cool and harden: Allow the wax melts to cool and harden. This process typically takes at least an hour, but you may leave them for longer if necessary. The cooling time will depend on the size and thickness of your wax melts.
- Remove from molds: Once the wax melts have completely cooled and hardened, gently remove them from the molds. You can use a toothpick or a small tool to help with the process, ensuring not to damage the shapes.
Now that you’ve successfully made your own wax melts, you can enjoy the wonderful fragrances they will bring to your home. Remember to experiment with different recipes, colors, and molds to create unique wax melts that reflect your personal style.

Tips for Making Perfect Wax Melts
Making wax melts may seem simple, but there are some tips and tricks that can help you achieve the best results. Follow these wax melt making tips to enhance your DIY project:
- Use a Fragrance Oil Calculator: To ensure the right amount of fragrance is added to your wax melts, use a fragrance oil calculator. This handy tool will help you determine the correct measurement for your desired scent intensity.
- Monitor Wax Temperature: It is important to monitor the temperature of your wax while melting and adding fragrance oil. Follow the recommended temperature range to prevent overheating or underheating, which can affect the scent throw of your wax melts.
- Let the Wax Melts Cool and Cure: After pouring the melted wax into molds, allow the wax melts to cool and cure for the recommended time. This curing process enhances the fragrance and ensures that your wax melts are fully solidified.
- Experiment with Molds, Colors, and Fragrance Combinations: Get creative with your wax melt creations by trying out different molds, colors, and fragrance combinations. You can use silicone molds in various shapes and sizes, and also experiment with adding wax dye for visually appealing melts.
By following these tips, you’ll be able to make perfect wax melts with optimal fragrance and visual appeal. Get ready to fill your home with delightful scents that can be customized to your preferences.
Quick Reminder:
Always remember to exercise caution when working with hot wax and fragrance oils. Follow safety guidelines and instructions provided by the wax and fragrance oil manufacturers.
Packaging and Storing Your Wax Melts
Once your wax melts have cooled and cured, it’s time to package and store them properly. Proper packaging and storage will help preserve the fragrance of your wax melts, ensuring they remain fresh and ready for use whenever you desire.
Airtight containers or plastic bags are recommended for storing wax melts. These containers create a barrier that helps seal in the scent, preventing it from dissipating over time. You can find a variety of airtight containers in different shapes and sizes to suit your preferences.
When it comes to packaging, you have several options to choose from:
- Mason jars are a popular choice for storing wax melts. They are durable, visually appealing, and allow you to see the beautiful colors and designs of your wax melts.
- Tins are another great option for packaging wax melts. They are portable, easy to stack, and can be decorated with labels or stickers to add a personal touch.
- Clamshell molds provide a professional look to your wax melts. They are convenient for storing and displaying your melts, making them an ideal choice if you plan to sell or gift your creations.
Regardless of the packaging option you choose, make sure it is clean and free from any residue or strong odors that could affect the fragrance of your wax melts.
Tips for Packaging and Storing Wax Melts:
- If using plastic bags, ensure they are made of a thick material to prevent any accidental tears or leaks.
- Label your containers or bags with the name and scent of the wax melts for easy identification.
- Store your wax melts away from direct sunlight and heat sources, as excessive heat can cause them to melt or lose their scent.
- Organize your packaged wax melts in a cool, dry place, such as a drawer or cabinet, to maintain their quality.
- To prevent different scents from mixing, consider storing each fragrance in separate containers.
By following these packaging and storing tips, you can ensure that your wax melts remain fresh and fragrant for an extended period, ready to fill your home with delightful scents whenever you choose to use them.
Enjoying Your Homemade Wax Melts
To fully enjoy the delightful scents of your homemade wax melts, follow these simple steps. First, plug in your wax warmer and turn it on. This will begin the melting process and activate the fragrance of the wax melts.
Next, place a wax melt liner in the melting cup of your wax warmer. These liners are incredibly useful as they prevent any mess and make it easy to change to different scents when desired.
Now, add a few wax melts to the melting cup. The number of melts you use will depend on their size and the desired level of fragrance. As the wax melts, it will gradually release its beautiful scent, filling your home with a captivating aroma.
Remember to turn off the wax warmer when it’s not in use to conserve energy and ensure safety. When you’re ready to enjoy the fragrance again, simply reheat the wax by turning the warmer back on. Sit back, relax, and let the wonderful aroma of your homemade wax melts envelop your space.
FAQ
How do you make your own wax melts?
To make your own wax melts, you will need wax, fragrance oils, molds, and equipment for melting the wax. Melt the wax, add fragrance oils, pour the mixture into molds, and let it cool and harden.
What are wax melts and how are they different from candles?
Wax melts are small pieces of scented wax that are heated in an electric wax warmer to release their fragrance. They are safer than burning candles and come in various shapes and sizes, while candles have a wick and are generally larger.
How do you choose the best wax for DIY wax melts?
You can choose from different types of wax, such as paraffin wax, soy wax, and beeswax. Consider the properties you desire in your wax melts and your personal preferences when selecting the best wax for your project.
What supplies and equipment do you need for making wax melts?
You will need silicone molds or clamshell molds, fragrance oils, wax dye (optional), a metal pitcher, a plastic eye dropper, a digital meat thermometer, and a wax warmer for melting the wax.
What is the step-by-step process of making wax melts?
The process involves measuring and melting the wax, adding dye and fragrance oils, pouring the mixture into molds, and allowing it to cool and harden. The detailed steps and ratios will depend on the specific recipe you are using.
Are there any tips for making perfect wax melts?
Yes, using a fragrance oil calculator, monitoring the wax temperature, and letting the wax melts cure for the recommended time can help achieve the best results. Experimenting with different molds, colors, and fragrance combinations can also add a creative touch to your wax melts.
How should I package and store my wax melts?
It is recommended to store wax melts in airtight containers or plastic bags to preserve their fragrance. Mason jars, tins, or clamshell molds are popular packaging options that give your wax melts a professional and appealing look.
How do I enjoy my homemade wax melts?
Simply plug in your wax warmer, place a wax melt liner in the melting cup, then add a few wax melts. As the wax melts, it will release its fragrance and fill your home with a delightful scent. Remember to turn off the wax warmer when not in use and re-heat the wax to enjoy the fragrance again.