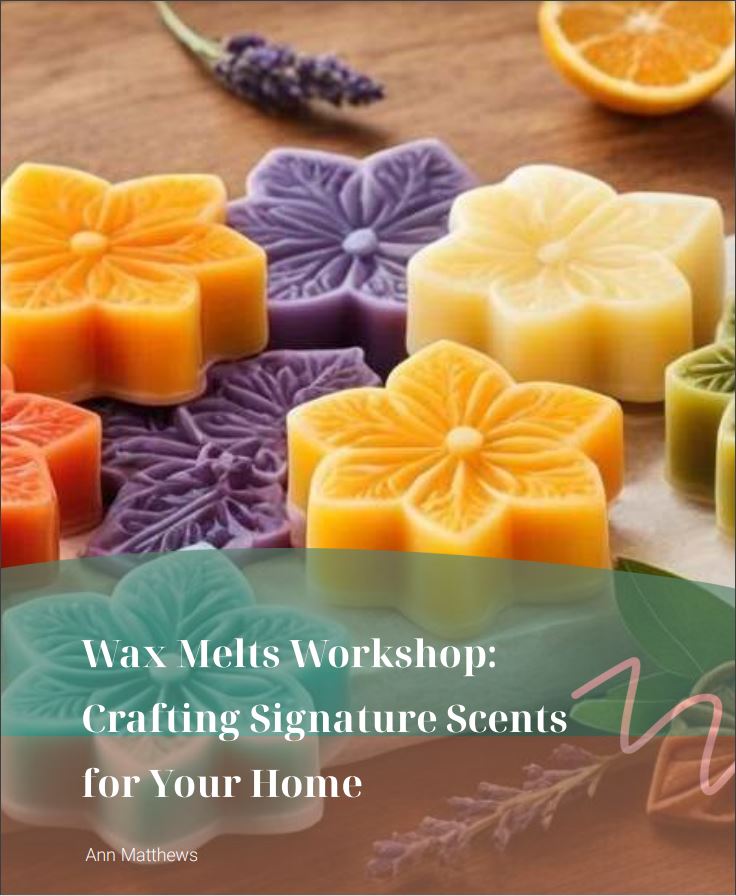
DIY Guide to Making Squeezable Wax Melts at Home
waxmelts.info and its partners may earn a commission if you purchase a product through one of our links
Squeezable wax melts are a popular option for wax melt lovers. They are easy to store and use, and you can customize the amount you use. In this DIY guide, we will walk you through the steps of making your own squeezable wax melts using ingredients like coconut oil, wax, fragrance oil, and dye.
Key Takeaways:
- Squeezable wax melts can be made at home in 10 easy steps.
- How to customizing the scent and color of your wax melts can multiply sales.
- Squeezable wax melts provide a stronger scent throw and longer-lasting fragrance.
- The higher quality the ingredients and materials the higher margins you can get when selling squeezable wax melts.
- A sense of achievement from of making your own fragrant home accents.
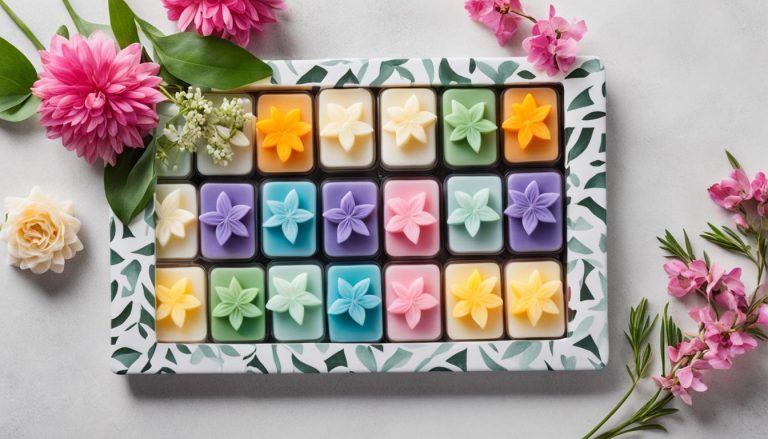
Benefits of Squeezable Wax Melts
Squeezable wax melts offer several benefits that make them a popular choice among wax melt enthusiasts. These unique wax melts provide a convenient and customizable experience, allowing you to fill your home with delightful fragrances in a hassle-free way.
Easy to Use
Squeezable wax melts are incredibly easy to use. Simply scoop a small amount of wax using a spoon and add it to your burner or warmer. The wax quickly melts, releasing a fragrant scent into the air. It’s a simple and effortless way to enjoy the aromas you love.
Customizable Scents
One of the greatest advantages of squeezable wax melts is the ability to create your own unique combinations of scents. Whether you prefer fruity, floral, or warm and cozy fragrances, you can mix and match to your heart’s content. Customize your wax melts to reflect your personal taste and create a truly one-of-a-kind olfactory experience.
Convenient Storage and Transport
Squeezable wax melts offer easy storage and transport options, making them ideal for both small businesses and personal use. The squeezable packaging allows for compact storage, and you can easily take them with you when traveling or gifting them to loved ones.
Long-Lasting Fragrance
Squeezable wax melts release a long-lasting fragrance that can fill your home with a pleasant aroma. The slow and consistent melting process ensures that you can enjoy the scent for extended periods, creating an inviting atmosphere in any room.
Safe and Clean
Squeezable wax melts offer a safe and clean alternative to traditional wax melts. With no need for open flames or messy wax chips, you can enjoy the beauty of flickering candlelight and delightful scents without the worry of accidental spills or burns.
Affordable Option
Squeezable wax melts provide an affordable way to enjoy a variety of scents in your home. Instead of purchasing multiple candles or traditional wax melts, you can easily switch between different fragrances with squeezable wax melts, maximizing your scent collection without breaking the bank.
| Benefits of Squeezable Wax Melts |
|---|
| Easy to use |
| Customizable scents |
| Convenient storage and transport |
| Long-lasting fragrance |
| Safe and clean |
| Affordable option |
Step-by-Step Guide for Making Squeezable Wax Melts
If you want to create your own custom squeezable wax melts, follow this easy step-by-step guide. With just a few ingredients and some simple techniques, you’ll soon have delightful wax melts to fill your home with beautiful fragrances.
- Start by gathering the necessary ingredients to make your squeezable wax melts. You will need:
| Ingredients | Quantity |
|---|---|
| Wax | 200 grams |
| Coconut oil | 100 grams |
| Fragrance oil | 20-30 drops |
| Liquid dye | A few drops (optional) |
| Mica powder | A pinch (optional) |
| Glitter | A sprinkle (optional) |
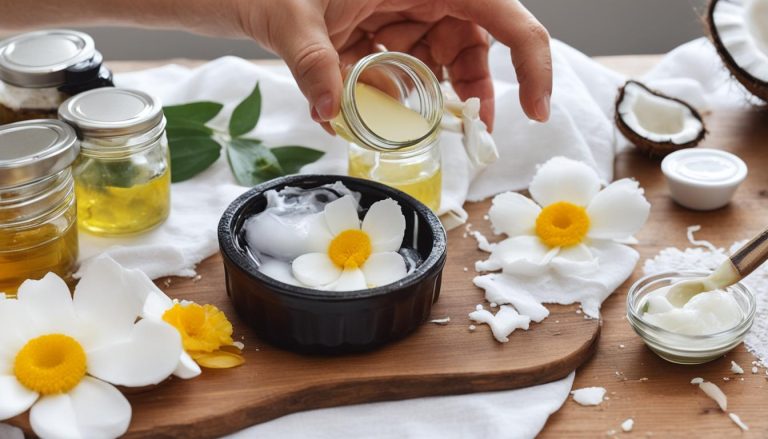
- Weigh out the wax and coconut oil according to the specified quantities in the ingredients table above. Place them in a melting pot or a double boiler and heat them until fully melted and combined. Stir occasionally to ensure even melting.
- Once the wax and coconut oil have melted, remove the mixture from heat and let it cool for a few minutes.
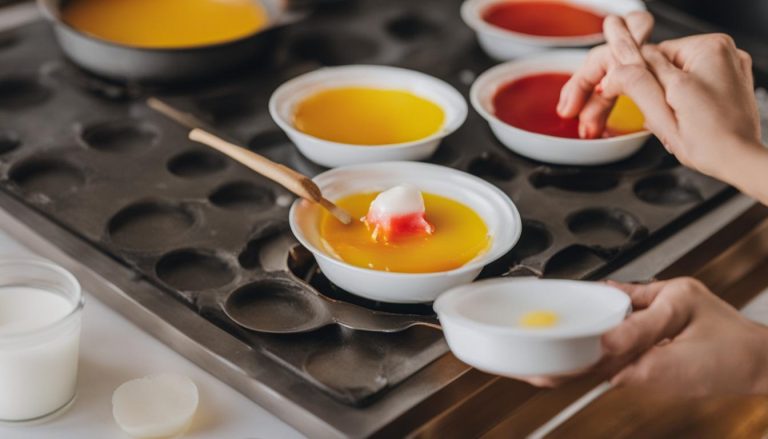
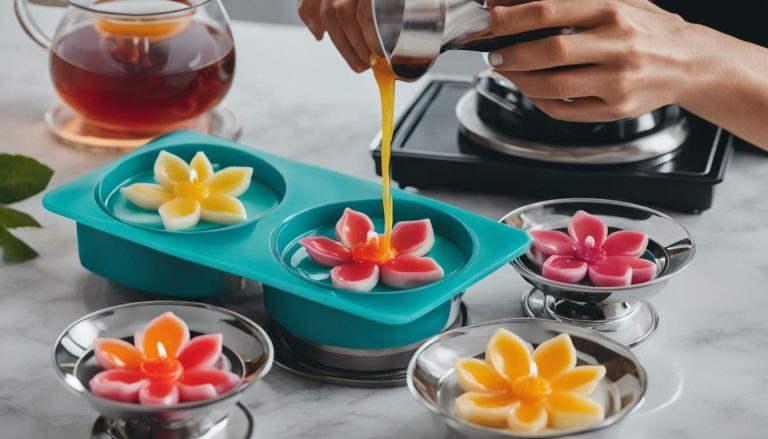
- Add the fragrance oil to the mixture. You can choose any scent you like or create unique combinations by mixing different fragrances.
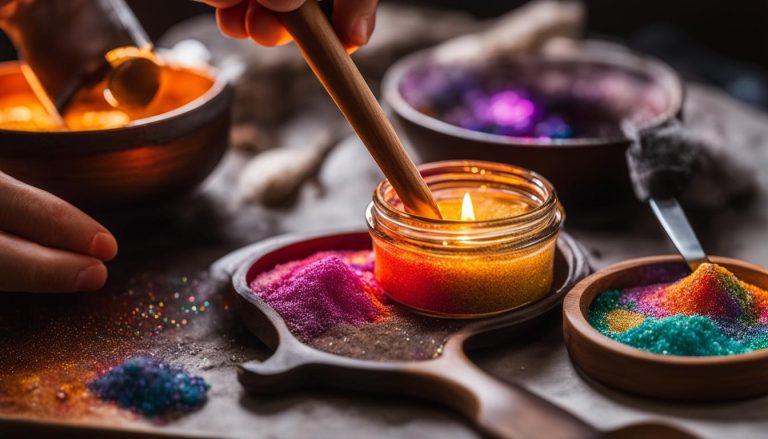
- If desired, add a few drops of liquid dye to give your wax melts a vibrant color. You can also add a pinch of mica powder for a touch of shimmer.
- Thoroughly stir the mixture to ensure that the fragrance oil and color are evenly distributed.
- Pour the melted wax mixture into a clean, dry jar. Fill it almost to the top, leaving a small space for the glitter.
- While the wax is still liquid, sprinkle a little glitter on top to add some sparkle to your wax melts. Use a toothpick or a spoon to gently mix the glitter into the wax if desired.
- Allow the wax to cool and solidify for a few hours. Make sure to place the jar in a safe location where it won’t be disturbed.
- Once the wax has fully set, your homemade squeezable wax melts are ready to use! They will continue to cure and develop their scent over the next 7 days.

Now that you know how to make your own squeezable wax melts, it’s time to get creative! Experiment with different fragrances, colors, and glitter combinations to create personalized wax melts that match your unique style and preferences. Enjoy the soothing scents and warm ambiance that these homemade wax melts will bring to your home.
Best Ingredients for Squeezable Wax Melts
When it comes to making squeezable wax melts, it’s essential to use the best ingredients to ensure a high-quality and enjoyable experience. The key ingredients for creating these delightful home fragrances include wax, coconut oil, fragrance oil, and dye.
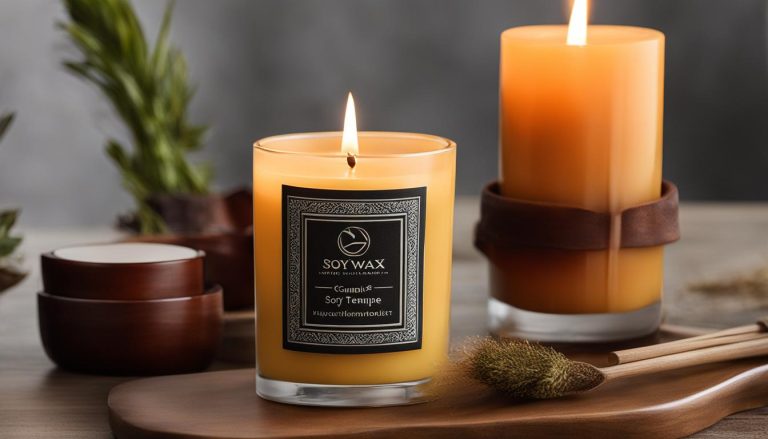
Wax: To achieve the ideal consistency and performance, it’s crucial to use a wax specifically formulated for wax melts. A recommended option is EcoSoya CB-Advanced, known for its excellent scent throw and long-lasting burn time.
Coconut Oil: Adding coconut oil to your recipe not only helps to soften the wax but also makes it easier to scoop out of the jar. The result is a more convenient and user-friendly product.
Fragrance Oil: Choosing the right fragrance oil is an important step in creating scented wax melts with enticing aromas. Consider scents that you enjoy and explore different combinations that complement each other. Whether you prefer floral, fruity, or woody fragrances, there are countless options available to suit your personal preferences.
Dye: If you wish to add a pop of color to your wax melts, liquid dye is the perfect choice. It allows you to customize the appearance of your melts, making them visually appealing and inviting.
Using the best ingredients ensures that your squeezable wax melts not only fill your space with captivating scents but also provide a delightful visual experience. Experiment with different combinations and explore the endless possibilities that these ingredients offer.
Recommended Brands for Squeezable Wax Melts
| Ingredient | Recommended Brands |
|---|---|
| Wax | EcoSoya CB-Advanced |
| Coconut Oil | Nature’s Way |
| Fragrance Oil | Scentsational |
| Dye | Candle Science |
“Using the best ingredients ensures that your squeezable wax melts not only fill your space with captivating scents but also provide a delightful visual experience.”
Tips for Making Squeezable Wax Melts
When it comes to making your own squeezable wax melts, there are a few tips to keep in mind to ensure the best results. Whether you’re a beginner or an experienced DIY enthusiast, these tips will help you create high-quality and fragrant wax melts that you can enjoy in your home.
1. Accurate Measurement with a Digital Weighing Scale
An accurate measurement of ingredients is crucial for the success of your wax melts. Invest in a digital weighing scale to ensure precise measurements of wax, coconut oil, fragrance oil, and dye. This will help you maintain the right proportions and consistency in your melts.
2. Thoroughly Stir the Wax and Oil Mixture
To achieve a smooth and consistent texture in your wax melts, make sure to thoroughly stir the wax and oil mixture. This will help evenly distribute the fragrance oil and dye, resulting in a well-blended and delightful scent experience.
3. Add Fragrance Oil and Dye at the Appropriate Temperature
Timing is key when adding fragrance oil and dye to your wax mixture. Wait for the wax to reach the appropriate temperature before incorporating these ingredients. This will ensure that the fragrance oil and dye are evenly distributed throughout the melt, enhancing the scent throw and color payoff.
4. Let the Wax Cool Before Pouring
Before pouring the melted wax into your jar, allow it to cool to the desired temperature. This step is important to prevent any warping or distortion of the container. It also helps in achieving a smooth surface on your wax melts.
5. Ensure Safety with Protective Gear
Working with fragrance oils and mica powder requires some precautions. Protect yourself by wearing gloves, an apron, and a chemical mask to avoid direct contact and inhalation. Safety should always be a priority when handling these ingredients.
By following these tips, you can create beautifully scented and squeezable wax melts that will elevate the ambiance of your home. Let your creativity flow and enjoy the process of crafting your own personalized wax melts.

| Tips for Making Squeezable Wax Melts |
|---|
| Accurate Measurement with a Digital Weighing Scale |
| Thoroughly Stir the Wax and Oil Mixture |
| Add Fragrance Oil and Dye at the Appropriate Temperature |
| Let the Wax Cool Before Pouring |
| Ensure Safety with Protective Gear |
How to Use Squeezable Wax Melts
Using squeezable wax melts is easy. Simply scoop out a small amount of wax using a spoon and add it to your wax burner or warmer. The wax will melt and release a fragrant scent into the air. Once the scent fades, you can add more wax to continue enjoying the aroma. Squeezable wax melts offer a convenient and customizable way to fill your space with delightful fragrances.
Whether you want to create a relaxing atmosphere in your bedroom or set a festive mood in your living room, squeezable wax melts provide a versatile option for scenting your home. Follow these simple steps to use your squeezable wax melts:
- Scoop out a small amount of wax using a spoon.
- Place the wax in your wax burner or warmer.
- Turn on the burner or warmer.
- Enjoy the fragrant aroma as the wax melts and releases the scent.
- If you prefer a stronger scent, add more wax to your burner.
With squeezable wax melts, you have control over the amount of fragrance you want to release at any given time. You can experiment with different combinations of scents, mixing and matching to create your own unique aroma. Whether you want a subtle scent or a bold fragrance, squeezable wax melts allow you to customize your home fragrance experience.
Recommended Materials for Making Squeezable Wax Melts
To make squeezable wax melts, you will need the following materials:
- Round 250ml jar with white cap
- Digital weighing scales
- 100ml measuring cup
- Milk or digital thermometer
- Metal spoon
- Melting pot
- Pan
- Kitchen roll for protection and cleaning
- Nitrile gloves and an apron for safety
- Chemical mask for protection against fragrance oil and mica powder
Making your own squeezable wax melts requires the right tools and materials. To ensure a successful and safe DIY project, gather the recommended materials listed above. The round 250ml jar with a white cap is ideal for storing your homemade wax melts. Using digital weighing scales and a 100ml measuring cup will help you accurately measure the ingredients and achieve the desired consistency. The milk or digital thermometer will ensure that the wax and oil mixture reaches the correct temperature. A metal spoon, melting pot, and pan are essential for melting and mixing the ingredients. Have kitchen roll on hand for protection and cleaning, as making wax melts can get messy. For your safety, wear nitrile gloves, an apron, and a chemical mask while working with fragrance oil and mica powder.
Final Thoughts
Making your own squeezable wax melts is a fun and rewarding DIY project. With the right ingredients and materials, you can create unique fragrances and enjoy the benefits of squeezable wax melts in your home.
By following our step-by-step guide, you can easily create your own signature scents and customize your wax melts to suit your preferences. Experiment with different fragrance oils and dyes to create beautiful and aromatic combinations.
Getting into crafting DIY squeezable wax melts not only provides a wonderful end product but allows experience the joy of making your own fragrant home accents. Get creative, have fun, and transform your space with delightful scents that will create a warm and inviting atmosphere for you and your loved ones.
FAQ
What are the benefits of squeezable wax melts?
Squeezable wax melts are easy to use, customizable, and convenient to store and transport. They release a fragrant scent that can fill your home with a pleasant aroma.
How do I make squeezable wax melts?
Follow our step-by-step guide to make your own squeezable wax melts using ingredients like wax, coconut oil, fragrance oil, and dye.
What are the best ingredients for squeezable wax melts?
The key ingredients for making squeezable wax melts are wax, coconut oil, fragrance oil, and dye. It is important to use a wax specifically formulated for wax melts and choose fragrance oils and dyes that complement each other.
What are some tips for making squeezable wax melts?
Use a digital weighing scale for accurate measurements, stir the mixture thoroughly, add fragrance oil and dye at the appropriate temperature, and use safety precautions when working with fragrance oils and mica powder.
How do I use squeezable wax melts?
Scoop a small amount of wax using a spoon and add it to your wax burner or warmer. The wax will melt and release a fragrant scent. Add more wax as needed to continue enjoying the aroma.
What materials do I need to make squeezable wax melts?
You will need a round 250ml jar with a white cap, a digital weighing scale, a 100ml measuring cup, a milk or digital thermometer, a metal spoon, a melting pot, a pan, kitchen roll for protection and cleaning, nitrile gloves, an apron, and a chemical mask for safety.